Line a cake tin with these simple steps and learn what we are using to stop cakes sticking when they go into the oven.
Time needed: 5 minutes.
How to Line a Cake Tin
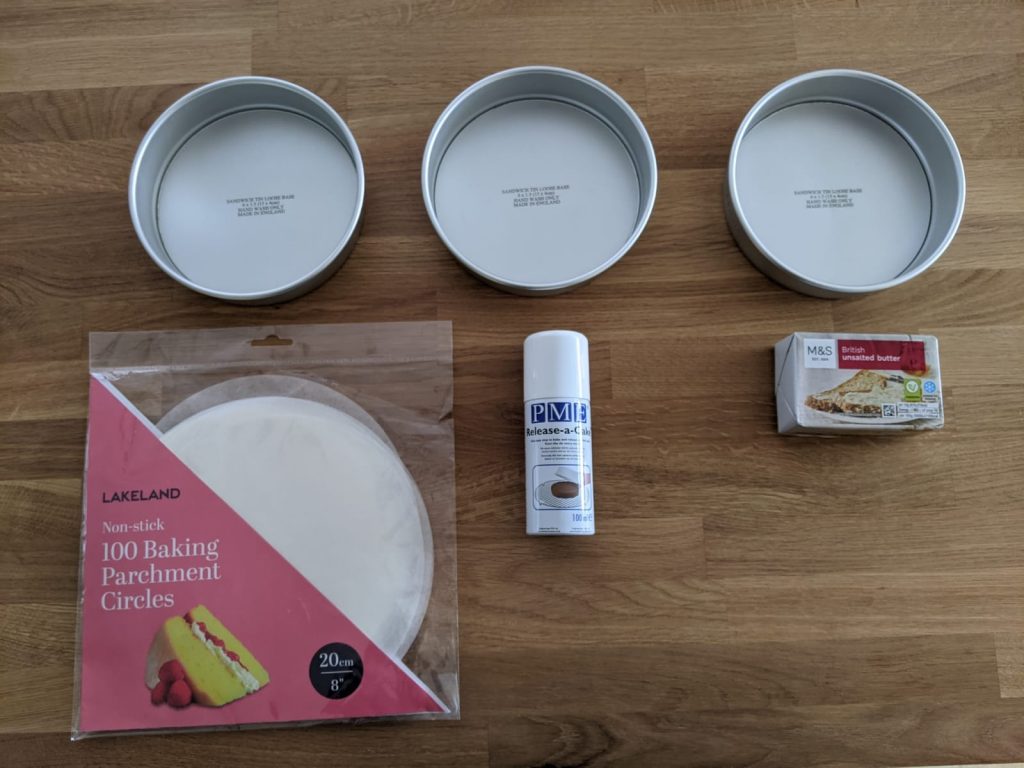
- Prepare your cake tins and other equipment
We recommended using the Silverwood baking tins for perfect, even sponge layers. Ensure you have the other essentials ready to line and grease your tins. You will need:
Baking parchment, butter and a piece of kitchen roll. - Cut out circles of baking parchment
For your baking paper, you can either cut out circles to match the size of the bottom of your tin or buy these pre-made circles from Lakeland.
For example, if you have an 8” wide cake tin, then the Lakeland 8” round baking parchment circles are perfect to line the bottom of your tin. - Butter the tins evenly
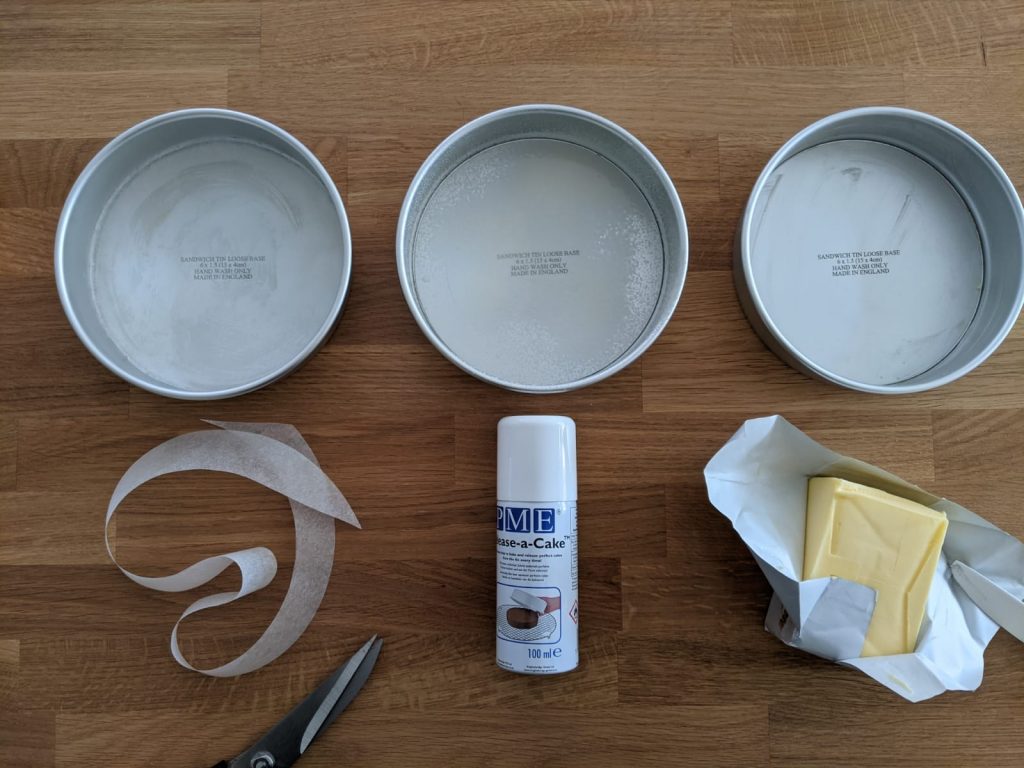
Use a small piece of your room temperature butter to fully grease your tins. You can do this easily by using your piece of kitchen roll, to smooth and press the butter around. Ensure you’ve greased every inch of your baking tin, including all around the sides as well. This will help in making sure no sponge sticking will take place.
- Place your baking parchment circle into the bottom of the cake tin
Press firmly down with the same piece of kitchen roll, making sure all the edges are flattened and there are no gaps between the paper and the tin.
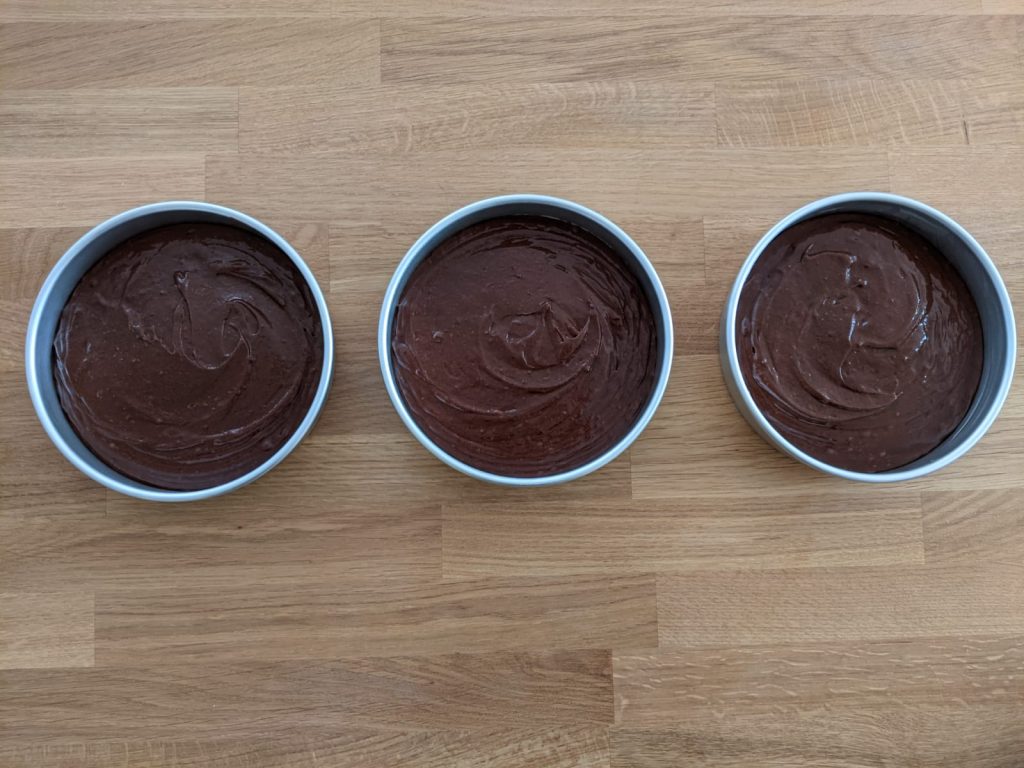
- Add your cake mixture and bake
Your tins will now be ready for you to add your Victoria sponge cake mix. Happy baking!
Cake Spray vs. Butter: which is best for lining a cake tin?
We get asked this question so many times, so we decided to test out the different options and show you the results. As always, we recommend using the Silverwood baking tins. They are made with a special type of metal which evenly distributes the heat during cooking. What does this mean for my cakes I hear you ask? Their baking tins offer an extremely even bake for your sponges, making them look and taste incredible.
As we have already explained above, the traditional method to line your tin includes using baking paper and butter. But what are the other options you can try?
- Baking paper and butter
- PME Release-A-Cake Spray
- Butter
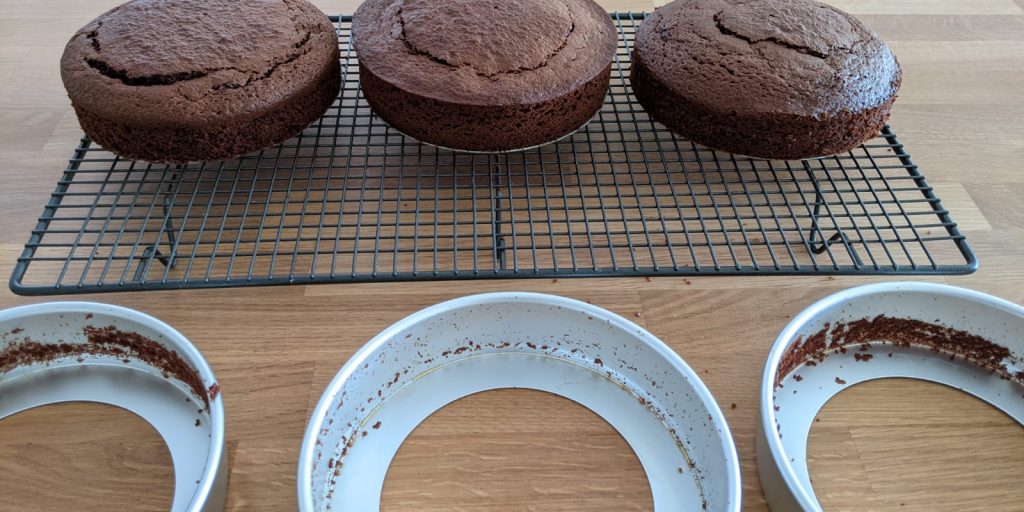
The next few pictures demonstrate the results of our experiment. We were testing out a delicious three-layer chocolate cake, using our Silverwood baking tins.
PME Cake spray tested!
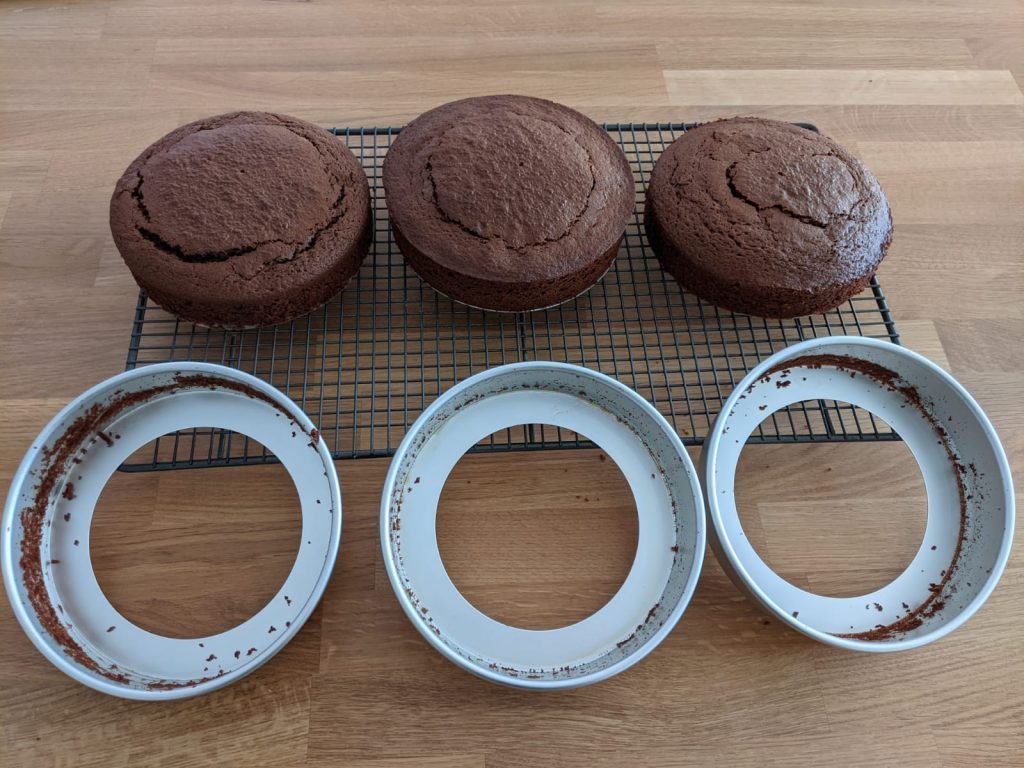
As you can see in the pictures above, each of the sponges were baked in the same sized tin. The cake mixture was equally measured out before being placed into the tins.
We left the cakes to cool for 5 minutes only in the tin, and then turned them out onto a cooling rack. This is very important, otherwise if you leave the cakes to cool fully in the tin they can crack and fall apart.
Even though the Silverwood tins offer some protection to prevent the sponges sticking, as you can see the middle cake had barely any cake residue left in the baking tray. This tin was lined only by using the PME Release-A-Cake Spray. There was a much more even bake with this layer, as the cake has not domed and there is a level top to the sponge.
Once they are already you might be ready to stack the cakes to form a birthday cake or other celebration cake. Just make sure you cut them correctly to maximise the portion sizes.
Conclusion
We would definitely recommend using the PME Release-A-Cake-Spray to grease all your baking tins in the future. It saves a lot of hassle having to cut baking parchment and use greasy butter. The results of our experiment also proved it was the best option, so that’s worth giving it a try right? Happy baking!