Making homemade bread is a popular hobby. However, only those who are bold enough take on the challenge of creating their own sourdough starter.
A sourdough starter is a fermented mixture of flour and water that you can make at home. The main benefit of a DIY sourdough starter is that it eliminates your need to purchase store-bought yeast to make your homemade bread. Plus, nothing tastes as delicious as sourdough bread fresh from your own oven.
Success in creating a sourdough starter is also an impressive mark of skill. While the ingredients in a sourdough starter are simple, the process for making it is not.
There are several common errors that can occur when making your sourdough starter. These problems can be somewhat demoralizing. Unfortunately, troubleshooting sourdough starter mistakes can be just as frustrating.
That is why we put together this comprehensive guide to help your sourdough starter ventures be a success. Read on to learn about some of the most common issues with sourdough starter and how you can resolve and avoid them.
Your Starter Won’t Rise
While there are a multitude of ways that your sourdough starter can go wrong, let’s begin with one of the most common issues. Many novice sourdough starter makers report that their starter will not rise in spite of their greatest efforts.
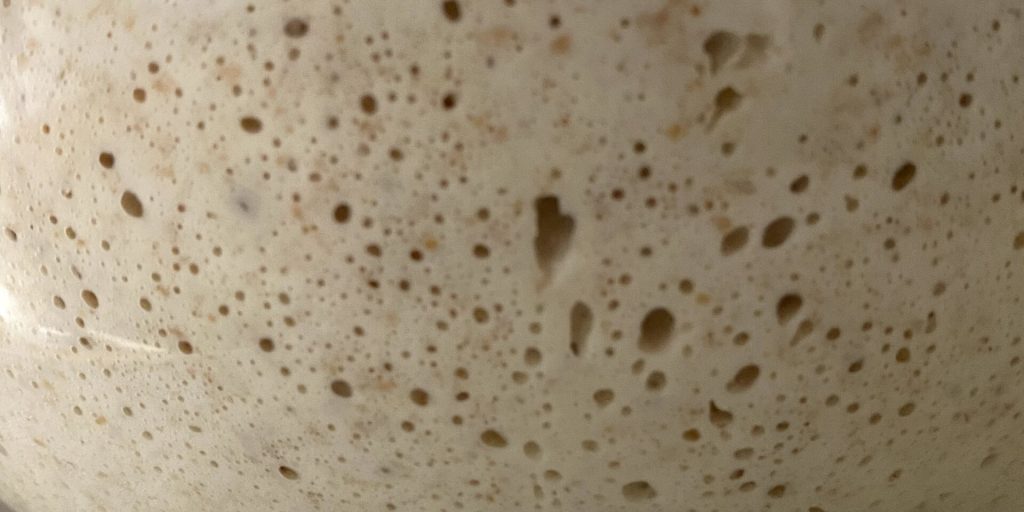
The ideal starter is active, meaning that it rises and has large bubbles. While that is the goal, are several reasons why a sourdough starter fails to rise. Here are some of the most common issues that can arise:
- Incorrect ingredients
- Low temperature
- Not enough feeding
Each sourdough starter experience is unique. That means that your starter’s failure to rise could come from one or more of the above problems. In the sections to follow, we’ll expand on those issues and help you address them.
What Are the Correct Ingredients for Sourdough Starter?
Flour, water and existing starter in equal quantities is a good place to start. I usually add 100g of each.
It seems like it would be impossible to mess up your starter ingredients. Considering all that you need is water and flour, some beginners do not put a lot of emphasis on the kind of flour and water they use. As you might guess now, the specific qualities of those fundamental ingredients play a significant role.
Regarding water, it is best that you use some form of filtered water. Tap water will suffice in some instances, but it leaves too much room for error. Tap water often contains small amounts of chemicals and usually chlorine which can kill your starter!
While you don’t notice those chemicals as you take a drink, your starter might. So, if you are using tap water, the chemicals it contains could be interfering with how your starter rises.
The flour you choose is also important. Later on, we will give you a more in-depth guide to flour for your sourdough starter. For now, you just need to know that you should use an unbleached whole grain flour for your sourdough starter.
Set a Warm Temperature
If your sourdough starter is not rising, it might be because it is too cold. Fermenting yeast prefers an environment that is warm but not excessively hot. The perfect temperature for a sourdough starter is 85 degrees Fahrenheit.
There are two ways that you can raise the temperature of a starter that is too cold. The first method is to ensure that you are using warm water for each feeding. Try using a thermometer to guarantee that the water you add is between 80 and 90 degrees.
The temperature of your starter’s surroundings plays a role as well. For the best results, you should store your starter in a warm area to encourage it to rise.
The Right Feeding Frequency
Sometimes, the reason your sourdough starter won’t rise is that you are not feeding it enough. Even when you follow a feeding schedule perfectly, you need to know that each mixture of flour and water is distinct.
The simple fact is that some starters may need more feedings than others. After addressing your ingredients and the temperature, you can try upping your feeding rate. Once you increase your feeding frequency, you might soon find that your starter is rising as you want it to.
Your Starter Exploded
While a lot of beginners are worried about their starter not rising, other people have the opposite issue. If you are in the second group, you may find that your sourdough starter has exploded out of its container.
An overflowing starter is not just a kitchen mess. It is also something that you can avoid easily by following a few tips. Here are a few reasons your starter might explode:
- High temperature
- Too much feeding
- An inadequate container
As with rising problems, an exploding starter can come from several causes. Some of these causes share a close relationship with those that prevent your starter from rising. This phenomenon points to the fact that creating a sourdough starter is a delicate balancing act. Now, let’s explore a few ways that you can deal with this problem.
Don’t Let Your Starter Get Too Warm
It may be more common for your starter to be too cold, but it can become too warm as well. That excessively high temperature will encourage your starter to rise too quickly. When that happens, it can expand beyond the constraints of its container.
Avoid Overfeeding
When it comes to feeding your starter, you can do too much and too little. If you overfeed your starter, the living parts of the mixture will continue to consume the fuel you have provided. As they have no concept of how much is too much, they will keep eating even when they reach the limits of their container.
It is important to be very measured in how you feed your starter. We mentioned in the last section that you could increase your feeding frequency if your starter does not rise. But don’t feed it so much that you create the opposite problem. It can be hard to find the perfect amount here. Just make sure you remain patient, and eventually, you will get the hang of feeding your starter.
Get the Right Container
The container you choose is very important to your sourdough starter success. While this may not be immediately apparent, the qualities of your container can be the main culprit behind your starter explosion.
The first container problem relates to expansion space. Of course, you hope that your starter will rise as you continue to feed it. But perhaps you did not consider how much space it would need to do so.
With that insight, it is easy to see why a small container could cause a sourdough starter explosion. So, make sure you choose a container that has plenty of space in which your starter can grow.
However, it is important to note that container size is not the only issue that can lead to an explosion. The lid you choose matters too.
Your best bet is to choose a lid that will have a loose fit on the top of your container. An air-tight lid can cause a significant build-up of pressure within your starter container. With no opportunity for ventilation, that pressure will eventually amount to an explosion.
A loose lid is one of the best choices, but that does not mean you have to use one. It is possible to use an air-tight lid under one condition. Only use an air-tight lid if you are sure that there is an ample volume of empty space that your starter can fill. Otherside, choose one that fits loosely.
Often, a tall mason jar is ideal. You can easily find a large mason jar that gives enough room to your starter. Also, mason jar lids are easy to adjust to allow for some airflow.
Your Starter Develops Mold
Occasionally, your starter can develop mold. If this happens to your starter, you need to know how to deal with sourdough starter mold.
Sourdough starter mold is a somewhat complex topic. So, in the following sections, we have broken down all the most important factors you need to understand to prevent mold and treat it when it appears.
Why Does Sourdough Starter Become Moldy?
As is becoming a common theme, there are a few reasons that can cause an unwanted outcome, like moldy sourdough starter. The most common reason that your starter is growing mold is that you accidentally contaminated it.
If you are not careful when feeding your starter, it is easy for you to drop other materials into it by accident. For instance, you might let a crumb fall into the mixture. That crumb can continue to decay and become a breeding ground for mold.
Mold can also be the result of infrequent feeding. When you feed your starter too infrequently, the yeast can become weak. That weakness affords mold the opportunity to dominate your starter container.
What to Do with Moldy Starter
If you are wondering what to do with a moldy sourdough starter, your course of action depends on how much mold you see. If the mold has spread throughout most of the starter, throw the mixture away and start over.
Starting over is often the safest option, but it is not the only one. If you catch the mold early, you might find that it has only affected some parts of the starter. If that is the case, you may have the chance to salvage your efforts.
When the mold goes no further than the surface of your starter, just remove the mold as soon as you can. Then scoop out some of the starter from a portion of the container that is not near the mold area.
Then take that unaffected starter scoop and relocate it to a new container. Continue feeding that new container as you normally would. If no strong smells or other signs of mold occur, you have successfully saved your starter.
You’re Using the Wrong Flour
As alluded to earlier in this post, the flour you use for your sourdough starter is of the utmost importance. There are numerous types of flour you can use. But there are also some flour qualities that you will want to avoid entirely.
As one of only two ingredients in your sourdough starter, it is hard to understate the importance of high-quality flour. Flour contains the microbes that are responsible for the fermentation process that takes place as you make your starter.
Without that fermentation, your starter stands no chance of rising at all. Here are a few kinds of flour that you can consider using for your next starter mix:
- All-purpose flour
- Bread flour
- Rye flour
- Whole wheat flour
As you can see, there are a few options available to you as you search for four for your starter. But there is one important rule that you should follow.
Do not use bleached flour in your sourdough starter.
That is right. The common bleached flour that many bakers use is not suitable for sourdough starter. The reason for this is simple. The bleaching process removes a large percentage of the nutrients and potential microbes in the flour. Without those microbes, the fermentation in your starter will be much weaker.
Now that you know to steer clear of bleached flour, you can proceed to choose the type of flour you like best. As you experiment with different flours, you will find that each one is unique.
The flour you use not only affects the rate of fermentation but can also influence the final texture of the bread you make. Rye, for example, often has a lot of microbes that lead to faster fermentation. But rye flour can also make your dough much thicker than other types of flour.
Take some time to try different methods. That way, you can discover which of the many flour options make for your favorite loaf of bread.
Your Starter Has Hooch
Once in a while, you might notice a dark, odorous material forming at the top of your sourdough starter. Many novices are quick to believe that his material is mold. However, it is more common that your starter is producing hooch, not mold.
Hooch is an alcoholic liquid that can occur naturally wherever yeast fermentation takes place. Considering yeast fermentation is essential to making a sourdough starter, the production of hooch is a possibility.
Despite being a natural byproduct of the fermentation process, many are worried when they find hooch on their starter. If this happens to you, you should first know that hooch is not harmful. It will not poison you or ruin your starter. So, don’t throw out your starter at the first sign of a hooch layer.
Hooch generally forms when you have underfed your starter. Take the presence of hooch as a sign that you should begin feeding your starter on a more frequent basis.
You will also want to get rid of excess hooch before you continue. Fortunately, this is a very easy process. Since hooch is harmless, you can stir small amounts back into your starter. If you have a lot of hooch in your starter, you can simply pour it out then continue feeding your starter more regularly.
You Forgot About Your Starter
It is very typical for people to forget about their starter and assume that they need to start from scratch once again. But this is not usually the case.
Your starter is a collection of living organisms. As with any organism, like a pet or person, your starter needs food to continue living.
However, if you fail to feed your starter, hope is not lost. Consider your starter to be in a state of hibernation rather than complete death.
If your starter is in a hibernation state, it may look much less bubbly than it did before. The reason for that lack of activity is that a lot of the yeast in your starter has died. But the chances are that there is still a significant amount of living yeast in the starter.
If you want to save your starter, all you need to do is start feeding the yeast that is still living. Begin by bringing the starter to room temperature. Then you can feed your starter twice per day for a few days.
Each time that you feed your starter, you should discard half of the starter in your container. That process helps to rejuvenate your starter and bring it back to an active, bubbling state.
Forgetting about a starter is something that most bakers do at one point or another. So don’t give up on your starter if you become a bit negligent. Instead, follow the steps we just described. In a few days, your starter will be ready to go, and you will be able to make your next loaf of sourdough bread.
Conclusion
If it all goes well you’ll have something like this or even better!
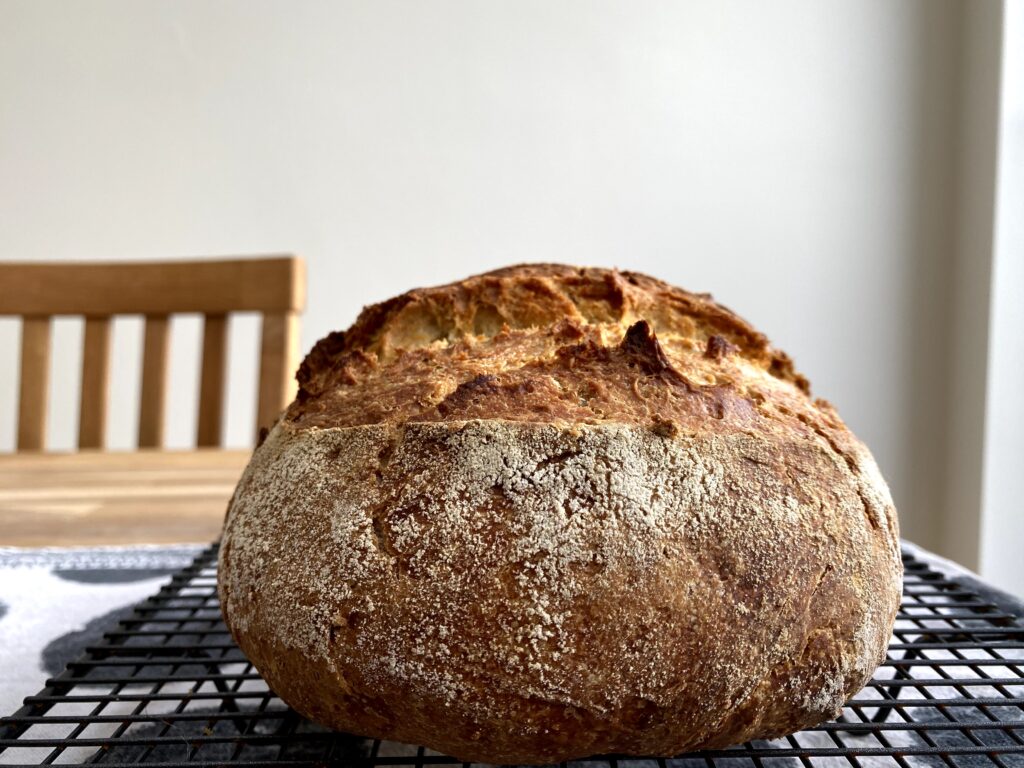
Creating and troubleshooting sourdough starter is challenging. But if you can pull it off, you might just be the envy of all your baking friends. Use the advice in this article whenever you are struggling with your sourdough starter. The guidance here will set you on the right track towards making a loaf of sourdough bread entirely from scratch.