Have you wondered how bakers get their American style buttercream so light and smooth? Well we’re here to give you all the hints and tips to get you on your way to professional delicious buttercream.
Time needed: 10 minutes.
How to cream butter (and sugar)
- Measure and Prepare
Measure out your butter into the KitchenAid mixing bowl. We suggest using the paddle attachment on your KitchenAid. Using the whisk attachment will cause the butter to get stuck in the whisk, and won’t cream effectively.
- Beat for 6-8 minutes
Turn on your stand mixer to a medium-high setting, and beat well for approximately 6-8 minutes. This is a good time to prepare all your other ingredients, or have a quick tea break!
- Ready to add sugar
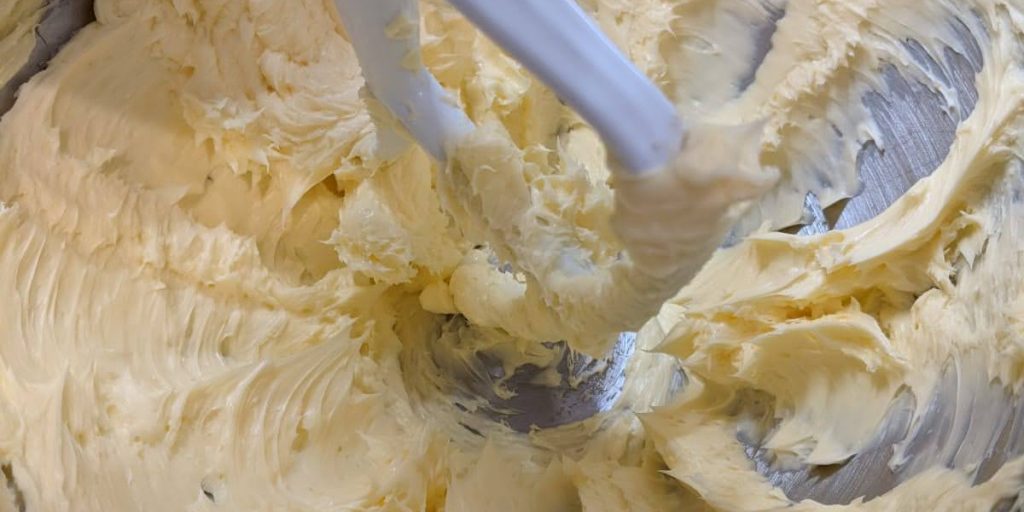
Your butter should have whitened in color. It should also be much smoother in consistency, and should be sticking to the sides of the bowl.
How to cream butter and sugar
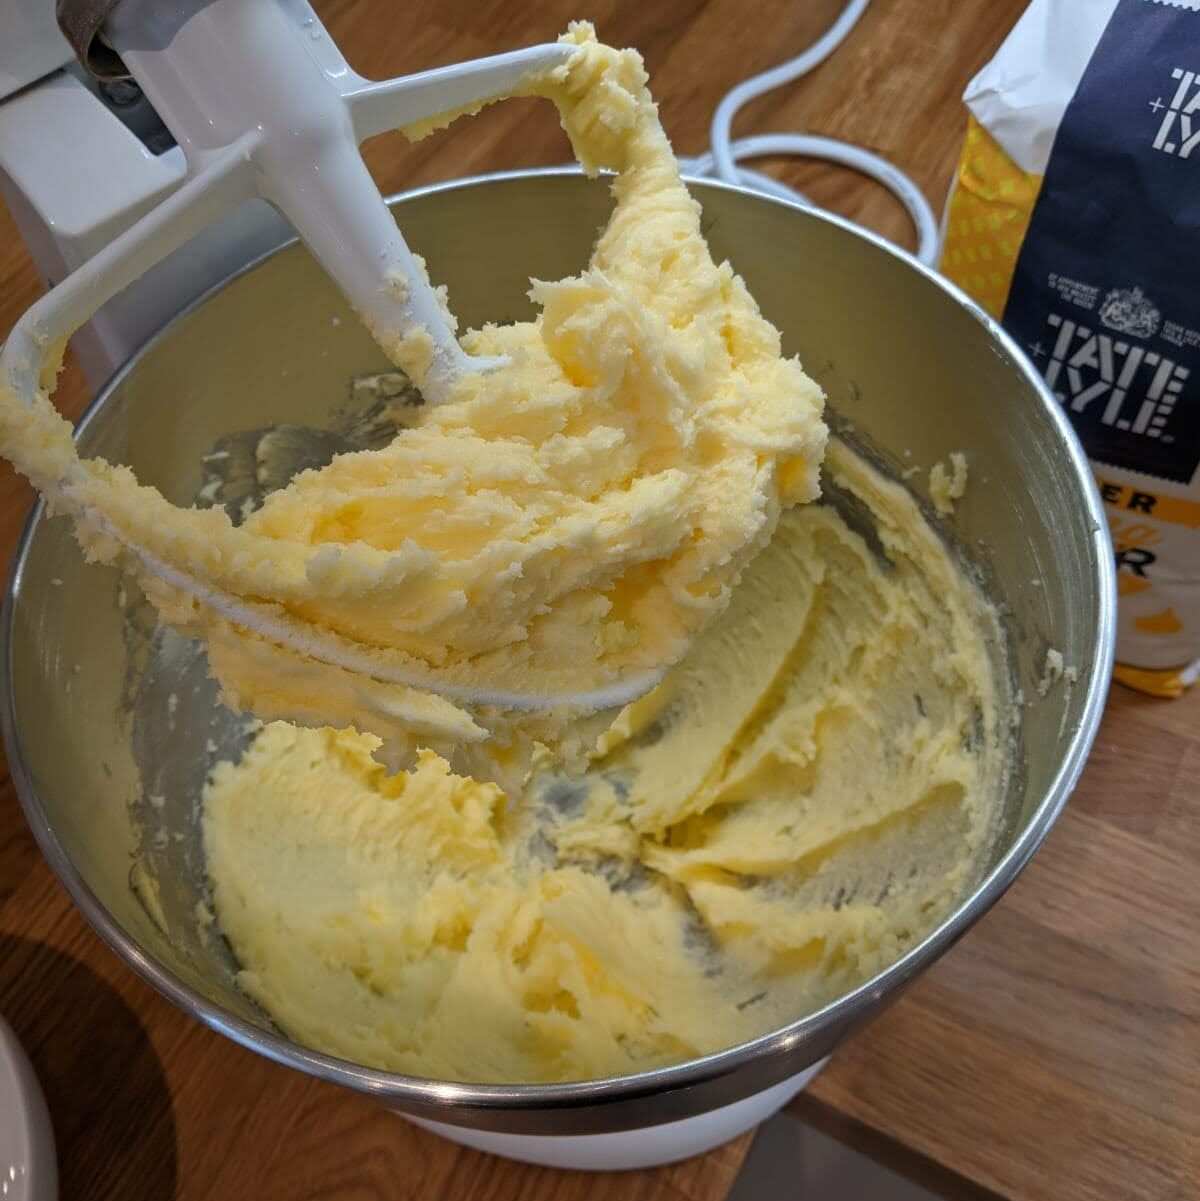
- Now that your butter is smooth, you are ready for the next stage. It’s now time for you to add the sugar. Most cakes use a type of caster sugar, if the aim is for a light fluffy sponge. We use Tate & Lyle white caster sugar, due to the superfine granules which result in the best sponge results.
- Measure out your sugar and add to the bowl of butter. The paddle attachment will still be the best to use for your creaming. Turn the mixer to a medium speed, and allow the butter and sugar to cream together for 2-3 minutes.
- One your butter and sugar have had a chance to mix together well, the color should still be light and creamy. There should be no visible lumps of sugar. If there is, you may need to leave the mixture creaming for a little longer.
- Your mixture is now ready to add the rest of your ingredients to your cake.
Stand Mixer for creaming butter
A helpful tip before you start properly mixing all of your cake ingredients together is to cream the butter. This helps to get the butter extremely light and fluffy.
We recommend using a KitchenAid or hand mixer for the technique of creaming your butter. You can use a good old wooden spoon, but you’ll need a lot of elbow grease to get the desired consistency.
By using a stand mixer with the softened butter and sugar, this ensures the effective creaming together. Increase the speed on your stand mixer to medium high to take your mixture from a pale yellow to almost white in consistency.
Scrape down the side of your mixing bowl with a rubber spatula. When the sugar mixture is pale in color, continue the process beating on high speed. For best results, properly creamed butter should have minimal air bubbles. If you still have air bubbles present, this is a sign you may need to beat the butter for a few more minutes.
Prepare your butter for creaming
We follow correct food hygiene policies, and keep our butter in the fridge. You’ll need to take the butter out of the fridge around 1 hour before using, to ensure the correct consistency and texture for creaming.
The butter should have been allowed to warm slightly to room temperature. It should be soft to the touch and pliable. If your butter still feels too cold, you can warm it in a microwaveable bowl in 10-second bursts. Make sure you keep an eye on the butter so it doesn’t get too soft and melt!
History of butter
Butter is a dairy product made from the fat and protein contents of churned cream. It normally is pale yellow in color, but some manufacturers manipulate the color with food colorings. The vast majority of butter used to be made by hand on farms, up until the 19th century. Butter consumption declined during the 20th century, because of the rise in margarine popularity. More margarine is eaten in the US than butter. Margarine is tended to be considered healthier and cheaper.
Butter vs margarine
With so many people taking up baking recently, there has been an increase in people trying their hand at cupcakes with piped buttercream on top. But how can you make sure the butter is the right consistency for piping, and what does it mean when a recipe is asking you to cream the butter? Hopefully our step-by-step guide on creaming butter and sugar has been useful. The advice can help with your baked goods in the future.
A few more traditional recipes will suggest the “all in one” method, by adding all the ingredients into a bowl and mixing at the same time. We love the baker Mary Berry in England, but she loves the traditional “all in one” method. In our experience, you are not able to introduce as much air into the mixture to produce a light sponge. You are also more likely to have a lumpy batter, which could result in holes in your sponge.
In summary, when a recipe states to use butter or margarine, always choose butter! Unless of course you are making a dairy-free cake. Although traditionally used in cake making, margarine is heavily processed. We recommend using a high quality unsalted butter (Yeo Valley/ President) for your baking. Creaming butter and sugar together will help you to create a light and fluffy cake mixture and will enhance your baking.